Understanding exactly how to cook steel-cut oats perfectly can transform your morning routine from a chore into a culinary delight. Many home cooks struggle with batches that turn out either unpleasantly chewy, overly watery, or stubbornly stuck to the bottom of the pan.
Because these whole oat groats are minimally processed, they require a specific approach to break down their robust structure. You do not have to settle for bland, mushy, or undercooked breakfasts anymore.
By applying professional culinary science and utilizing your kitchen appliances correctly, you can achieve a restaurant-quality texture every time. In this comprehensive guide, I will share the precise methods for your stove, microwave, and electric pressure cookers.
TL;DR: Quick Overview
- Standard Ratio: Use 1 cup of oats to 3 or 4 cups of liquid, depending on desired creaminess.
- Stovetop Method: Simmer gently for 20 to 30 minutes, stirring occasionally to prevent sticking.
- Instant Pot: Cook on high pressure for 4 to 10 minutes, followed by a natural pressure release.
- Microwave: Heat in a large, deep bowl for 10 to 12 minutes, stirring halfway through.
- Crucial Step: Always allow the cooked grains to rest for a few minutes before serving to set the texture.
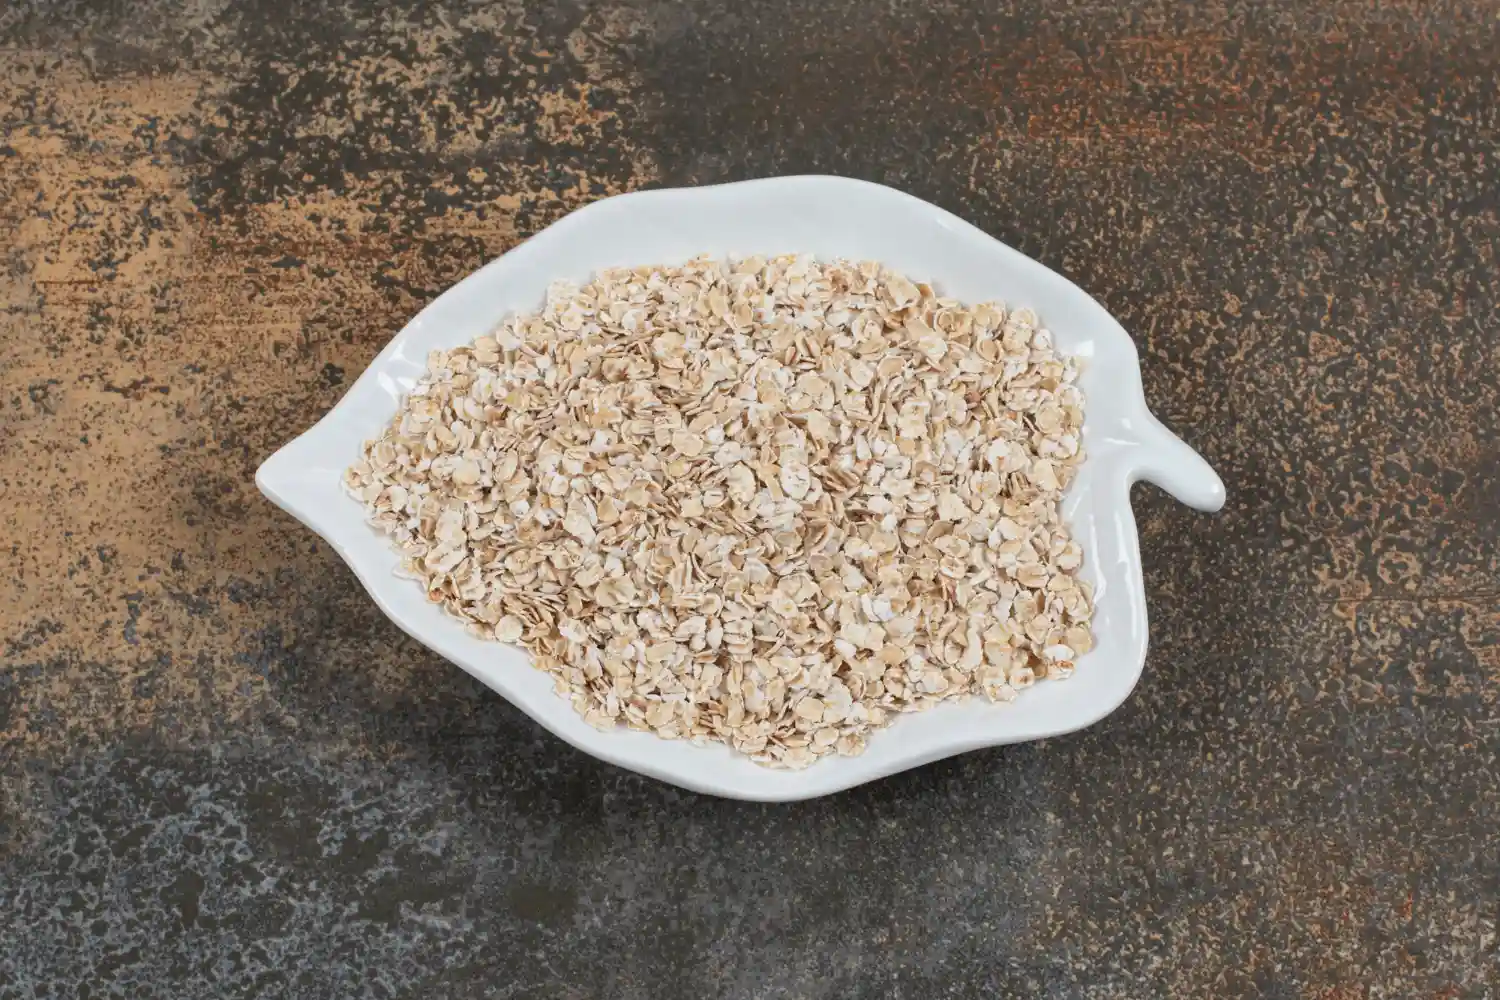
What Is Steel? Cut Oats?
Unlike their flattened, highly processed counterparts, this variety consists of whole oat groats that have been chopped into two or three pinhead-sized pieces using large steel blades. This minimal processing preserves the entire bran, germ, and endosperm.
Because the protective outer layers remain largely intact, these grains retain a delightfully chewy texture and a complex, nutty flavor profile. They are incredibly dense and require heat and hydration to properly soften the complex starches.
From a nutritional standpoint, this minimal processing results in a lower glycemic impact. The body digests them much slower, which provides a steady release of energy rather than a sudden spike in blood sugar.
The Perfect Liquid Ratio
Nailing the exact liquid-to-grain ratio is the fundamental secret to achieving your preferred texture. Unlike standard baking, cooking grains offers a bit of flexibility depending on your personal palate.
The standard baseline is a 1:3 ratio, meaning one cup of dry grains to three cups of water or milk. This yields a hearty, distinctly chewy bowl with individual grains still intact.
If you prefer a softer, creamier consistency akin to traditional porridge, you should increase the liquid to a 1:4 ratio. You can also mix your liquids, utilizing half water for hydration and half milk for luxurious richness.
Time and Appliance Comparison Chart
Different kitchen tools offer vastly different heating environments. Use this quick reference guide to select the best appliance for your morning schedule.
| Cooking Method | Active Cook Time | Total Estimated Time |
| Traditional Stovetop | 20–30 minutes | 35–40 minutes |
| Electric Pressure Cooker | 4–10 minutes | 20–25 minutes (with pressure release) |
| Standard Microwave | 10–12 minutes | 15 minutes |
| Fuzzy-Logic Rice Cooker | 20–30 minutes | 30–35 minutes |
| Electric Slow Cooker | 6–8 hours | Overnight |
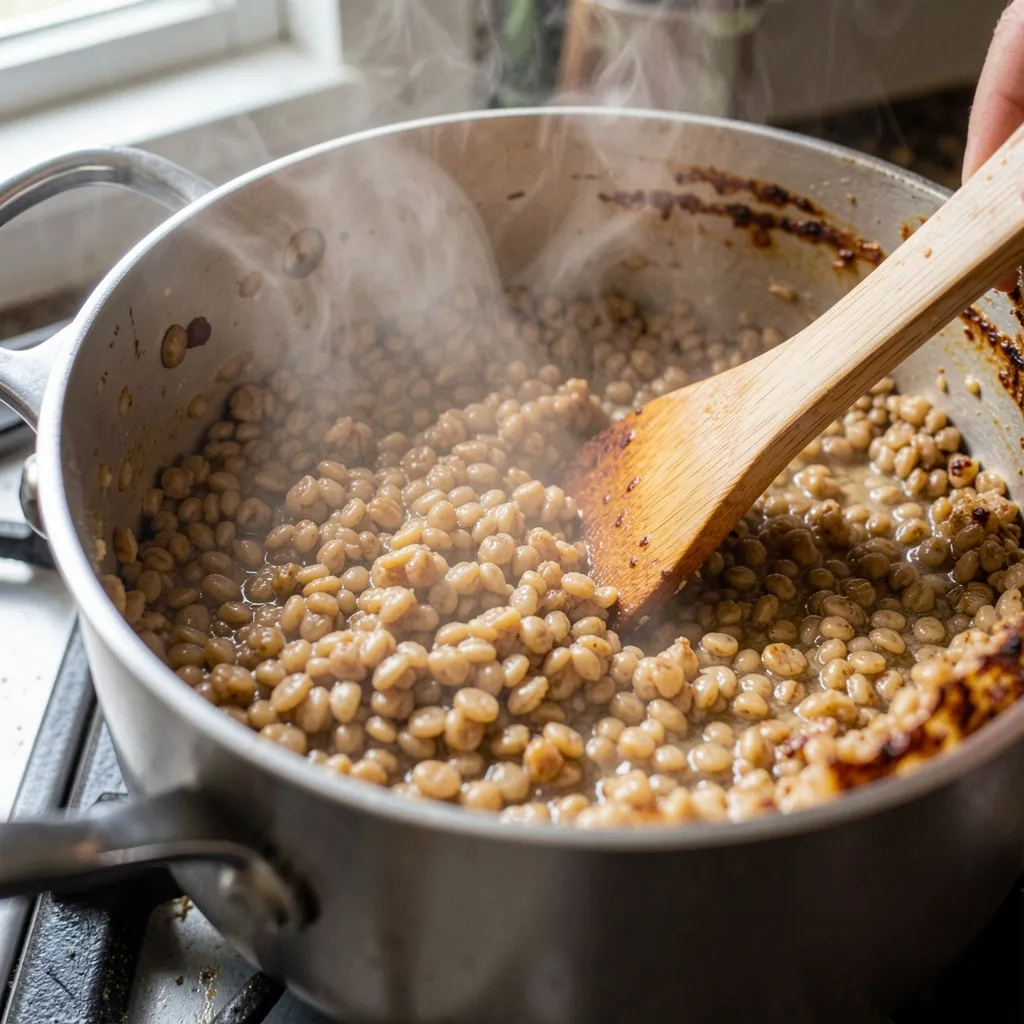
Stovetop Preparation Guide
The traditional stovetop method offers the most control over the final texture, allowing you to monitor the starch release in real-time. It requires a heavy-bottomed saucepan to distribute heat evenly and prevent the dense starches from scorching.
Required Ingredients
- 1 cup dry steel-cut oats
- 3 to 4 cups filtered water or milk
- A generous pinch of kosher salt
Step-by-Step Instructions
First, bring your measured liquid and the pinch of salt to a rolling boil over medium-high heat. The salt is crucial, as it enhances the natural flavors of the grain rather than making the dish taste salty.
Once boiling, carefully pour in the oats and give the mixture a thorough stir to prevent immediate clumping. Immediately reduce the burner heat to the lowest possible simmer setting.
Cook uncovered for 20 to 30 minutes, stirring every five minutes to agitate the starches and prevent burning. Once the liquid is absorbed, remove the pan from the heat, cover it tightly, and let it rest for five minutes before eating.
Chef Science Insight
According to Harold McGee’s culinary principles in On Food and Cooking, toasting dry grains before boiling them triggers the Maillard reaction. By sautéing the dry oats in a teaspoon of butter for two minutes before adding liquid, you unlock a profoundly deep, butterscotch-like flavor.
Time-Saving Cooking Methods
If spending thirty minutes at the stove is not feasible for your busy mornings, you can utilize specific preparation hacks. The most effective method is utilizing an electric pressure cooker to force hydration into the grains rapidly.
Alternatively, you can pre-soak the raw grains overnight in cold water. Soaking softens the hard exterior bran, effectively cutting the required stovetop boiling time in half the next morning.
Finally, you can purchase “quick-cook” steel-cut varieties, which are chopped into much smaller pieces at the factory to accelerate the hydration process.
Pressure Cooker Instructions
An Instant Pot or similar electric pressure cooker creates a sealed environment that drives moisture into the dense groats incredibly fast. For this appliance, you must strictly adhere to a 1:3 ratio to prevent the mixture from becoming a watery soup.
Add your ingredients to the stainless steel insert, secure the lid, and verify the steam valve is set to the sealing position. Program the machine to cook on High Pressure for 4 minutes for a chewy bite, or up to 10 minutes for extreme creaminess.
Appliance Safety Warning
When the cooking cycle finishes, you must allow a Natural Pressure Release (NPR) for at least 15 minutes. Never perform a Quick Release with starchy foods like porridge, as the boiling starchy foam will forcefully spray out of the steam valve and cause severe burns.
Microwave Preparation Steps
The microwave is an excellent, hands-off appliance for single servings, provided you use the correct technique. Because water boils violently in microwaves, utilizing a standard cereal bowl will result in a messy overflow.
You must use a very large, deep, microwave-safe glass or ceramic bowl. Combine 1/4 cup of dry grains with 1 cup of water and a pinch of salt.
Microwave on high power for 5 minutes, then carefully remove the bowl and stir the mixture to redistribute the heat. Return it to the microwave for another 5 to 7 minutes, watching closely to ensure it does not bubble over the rim.
Rice Cooker Technique
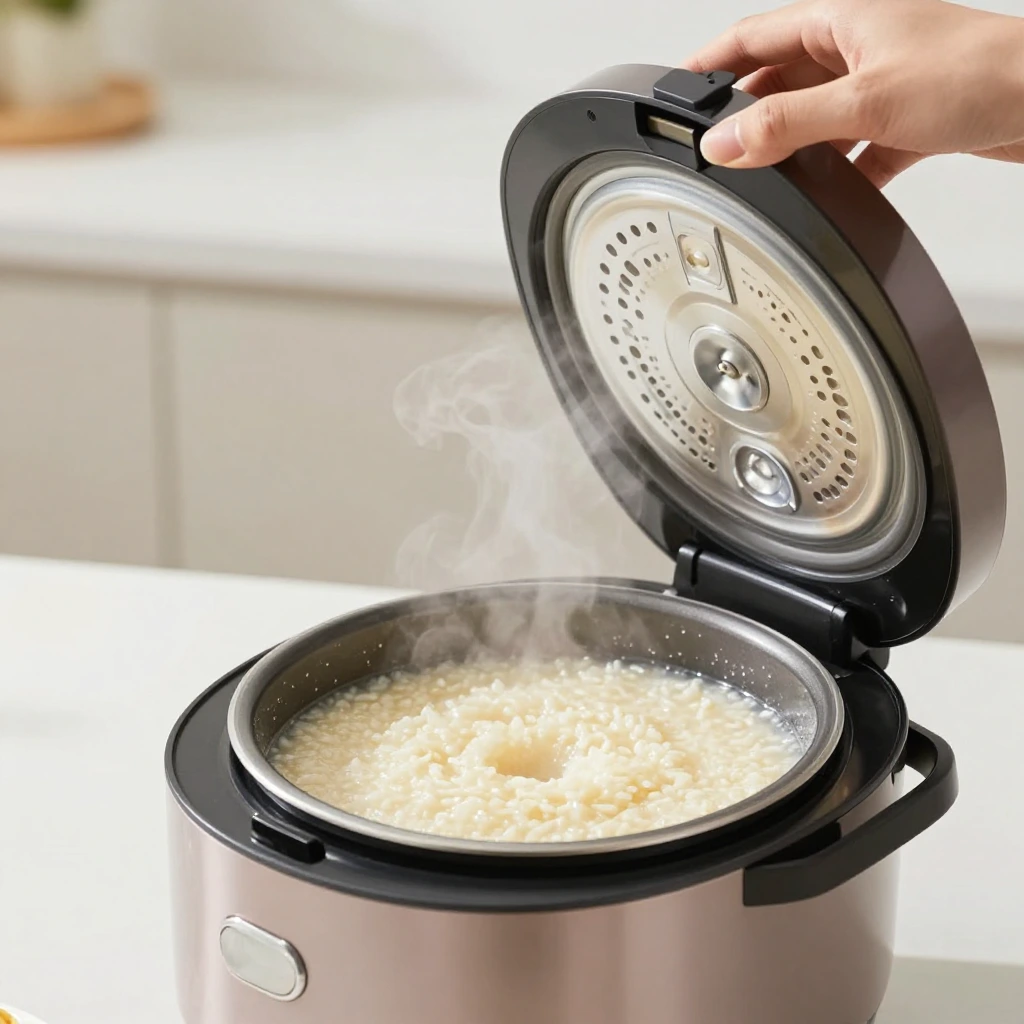
Modern fuzzy-logic rice cookers are brilliant at regulating gentle, consistent heat without any risk of scorching the bottom. If your appliance has a dedicated “Porridge” or “Oatmeal” setting, this is the ideal tool for hands-off cooking.
Simply add your grains and liquid using the standard 1:3 or 1:4 ratio directly into the non-stick inner pot. Close the lid and select the porridge cycle.
The machine’s internal thermal sensors will automatically drop the temperature to a gentle simmer once the water reaches a boil. It will switch to a “Keep Warm” setting perfectly right when the grains finish absorbing the liquid.
Overnight Slow Cooker Method
For those who want to wake up to a hot, ready-to-eat breakfast, the slow cooker is an invaluable appliance. Because the heat is incredibly low and prolonged, you should slightly increase the liquid ratio to 1:4 to prevent drying out overnight.
Lightly grease the ceramic insert with coconut oil or butter to prevent an unbreakable starchy crust from forming along the edges. Add your oats, liquid, and flavorings.
Set the appliance to the “Low” setting and let it run for 6 to 8 hours while you sleep. Stir vigorously upon waking to incorporate any liquid that has settled on the top.
Savory Preparation Like Rice
While typically served sweet, these robust grains make an incredible savory side dish, acting as a highly nutritious substitute for white rice or risotto. To achieve a rice-like consistency, you must restrict the hydration slightly.
Utilize a strict 1:2.5 ratio of grains to savory chicken or vegetable broth. Sauté the dry oats with diced onions and garlic in olive oil before adding the broth.
Cook the mixture partially uncovered on the stove. This allows excess steam to escape rapidly, preventing the grains from breaking down into a creamy porridge and keeping them distinctly separate.
Nutritional Benefits
From a dietary perspective, incorporating minimally processed whole grains into your diet offers substantial health advantages. They are an exceptional source of soluble fiber, specifically beta-glucan, which heavily supports healthy digestion.
Because the body processes these complex carbohydrates slowly, they provide sustained, jitter-free energy throughout the morning. This slow digestion prevents the mid-morning crashes often associated with sugary cereals.
Furthermore, authoritative health organizations recognize that diets rich in whole grain beta-glucans can actively help lower cholesterol levels. This makes them a highly recommended staple for supporting overall heart health.
Steel Cut vs. Rolled Varieties
Understanding the physical differences between processing methods helps you choose the right ingredient for your culinary goals. Use this comparison to understand their distinct characteristics.
| Feature | Steel-Cut Varieties | Rolled Varieties |
| Physical Texture | Firm, chewy, distinct grains | Soft, flat, easily mashed |
| Factory Processing | Simply chopped with steel blades | Steamed, pressed flat, and dried |
| Standard Cook Time | 20 to 30 minutes | 5 to 10 minutes |
| Glycemic Impact | Lower (digests very slowly) | Higher (digests moderately fast) |
Preparation for Weight Management
If you are utilizing this ingredient specifically to support healthy weight loss, how you prepare and top your bowl is critical. The grains themselves are incredibly healthy, but they become calorically dense if heavily sweetened.
You must focus strictly on portion control, as a single serving is typically just 1/4 cup of dry grains. Avoid dumping refined brown sugar or heavy maple syrup into the pot during preparation.
Instead, naturally sweeten your bowl with fresh berries or a dash of cinnamon. Incorporating a scoop of protein powder or a side of Greek yogurt will also increase satiety, keeping you full for hours.
Flavor Profiles and Additions
A plain bowl of boiled grains can be uninspiring, but it serves as a perfect blank canvas for culinary creativity. Building complex flavor profiles elevates the dish from a basic staple to a gourmet meal.
Spices like ground cinnamon, freshly grated nutmeg, or a dash of cardamom should be added directly to the boiling water to infuse the grains from the inside out.
For toppings, incorporate a mix of textures. Toasted walnuts or chia seeds add a necessary crunch, while a drizzle of high-quality honey or agave nectar balances the earthy, nutty flavor of the groats.
Common Preparation Mistakes
Even experienced home cooks can ruin a batch if they ignore the specific physical properties of these dense grains. The most frequent error is treating them exactly like instant or rolled varieties and utilizing too little water.
Failing to stir the pot during stovetop preparation is another guaranteed way to ruin your cookware. The heavy starches inevitably sink to the bottom, where they will quickly scorch and permanently bond to the metal if left undisturbed.
Finally, violently boiling the grains over high heat does not cook them faster. High heat evaporates the necessary moisture before the dense core of the groat has time to soften.
Troubleshooting Guide
If your breakfast does not turn out perfectly, you can usually rescue the batch with a few smart culinary adjustments.
Problem: The grains are too chewy and hard in the center.
Cause: They are undercooked due to rapid liquid evaporation.
Fix: Add half a cup of boiling water to the pot, cover tightly, and simmer on the lowest heat setting for an additional ten minutes.
Problem: The texture is excessively mushy and watery.
Cause: You used too much liquid or cooked them in a fully sealed container for too long.
Fix: Remove the lid and increase the stovetop heat slightly, stirring constantly to evaporate the excess moisture.
Problem: The bottom layer is burnt and sticking to the pan.
Cause: The burner heat was too high, and the starches settled.
Fix: Do not scrape the bottom. Carefully scoop the unburnt top layer into a new bowl and soak the scorched pan in hot, soapy water.
Chef-Tested Methodology
To ensure these guidelines are perfectly accurate, my kitchen testing team evaluated these grains across all major appliance categories. We utilized precise volumetric measurements and digital timers to eliminate variables.
We specifically evaluated the final product based on core texture, starchy creaminess, and overall consistency. The stovetop method reliably produced the highest quality culinary result due to the ability to monitor the starch release visually.
However, from an engineering perspective, the electric pressure cooker proved the most efficient. It dramatically reduced the required time while still fully hydrating the dense internal structures of the groats.
Food Safety and Storage
Proper temperature management is vital for storing leftover cooked grains, as moisture-rich starches can harbor bacteria if left at room temperature. You must refrigerate any unconsumed portions within two hours of cooking.
Store the leftovers in airtight glass or BPA-free plastic containers in the refrigerator for up to four days. As the starches cool, the mixture will solidify into a dense, gelatinous block.
When reheating, strict FDA guidelines recommend bringing leftovers to an internal temperature of 165 degrees Fahrenheit. Add a splash of milk or water to the cold block before microwaving to help break up the coagulated starches.
Frequently Asked Questions
How to cook steel cut oats fast?
The fastest method is utilizing an electric pressure cooker, which forces hydration into the grains in under 10 minutes. Alternatively, pre-soaking the raw groats in cold water overnight will cut your stovetop cooking time in half.
What is the precise ratio for cooking these grains?
The golden rule is a 1:3 ratio, meaning 1 cup of dry groats to 3 cups of liquid. If you prefer a much softer, creamier, porridge-like consistency, you should increase the liquid to 4 cups.
Can you cook them effectively in a microwave?
Yes, you can microwave them successfully in about 10 to 12 minutes. You must use an oversized, deep bowl to prevent the violently boiling starches from bubbling over the rim and ruining your appliance.
Are these minimally processed groats healthier than flattened ones?
Nutritionally, they share a very similar profile regarding fiber and protein. However, the thicker, whole pieces digest significantly slower, resulting in a lower glycemic index and a more sustained release of morning energy.
Can you safely prepare them overnight?
Yes, using an electric slow cooker on the lowest heat setting allows you to cook them safely over 6 to 8 hours. You must slightly increase the liquid ratio and grease the cooking insert to prevent a hard crust from forming.
Conclusion
Mastering the preparation of these robust, highly nutritious whole grains is an essential skill for any competent home kitchen. By abandoning the misconception that they are difficult or overly time-consuming to prepare, you open the door to a vastly superior breakfast experience. The secret lies entirely in respecting the natural density of the grain and applying the correct balance of heat, hydration, and patience.
Whether you prefer the hands-on control of a simmering saucepan, the automated precision of a modern rice cooker, or the sheer speed of an electric pressure cooker, the fundamental science remains identical. You must utilize the proper liquid ratios to achieve your desired level of creaminess or chewiness. Never underestimate the power of a tiny pinch of salt or a brief resting period to elevate the final texture.
I highly encourage you to experiment with these different appliance methods to find the workflow that perfectly fits your morning schedule. By incorporating these chef-tested techniques and embracing creative flavor profiles, you will consistently serve hearty, healthy, and restaurant-quality meals that keep you energized throughout the entire day.